


merXu Protected Payments
Užtikrinkite savo mokėjimą iki pristatymo.
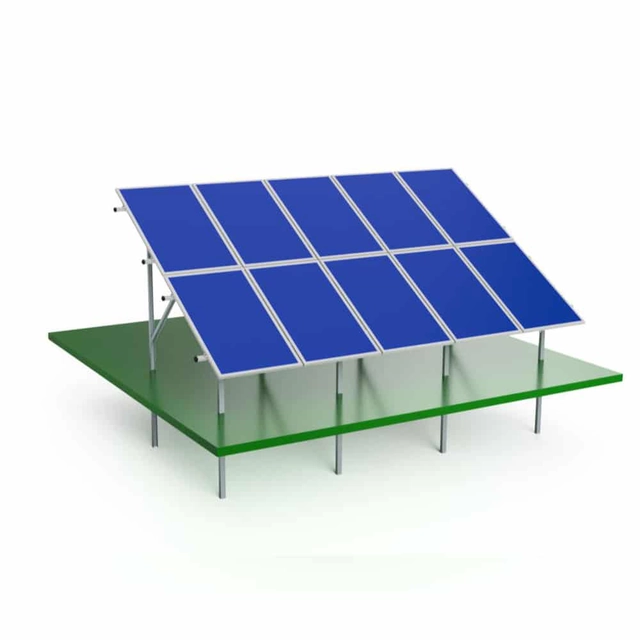
Elementų rinkinys konstrukcijai, betonuojamai į žemę ant 36 plokščių, kurių matmenys iki 250cm x 114cm/30mm vertikaliai, išdėstymas 18x2
Pasiūlymas iš tiekėjo:
Siuntimo šalis:
Paskirties šalys:
Numatoma pristatymo data:
MerXu rekomenduojami mokėjimo būdai:
Alternatyvūs mokėjimo būdai:
A set of elements for self-construction of an assembly system for 36 panels vertically, in an arrangement 18x2 concreted in the ground, (18 panels in a row, 2 rows).The system is not intended to be installed on the roof!(not certified for safety and resistance to, for example, wind)
It is a complete system and includes all elements except concrete for pouring.Assembly requires cutting the elements to the required length and drilling holes fi 10.The tools needed are an angle saw, a drill with a metal drill bit fi 10 and a wrench for turning. as well as a shovel or drill for digging.
System for panels of thickness 30mm,, length from 164 to 250 cm, maximum width of panels 114cm
Installation instructions:
We make elements from steel profiles 40x60 as shown in the drawing and mount them with screws M10x120 (red).We drill holes for screws fi 10. 10 of such sets
NOTE: 10 of the columns must be cut to obtain elements 130cm and 100cm
The yellow screw M10x140 connects 3 elements, i.e. these 2 pieces 230cm overlapping about 8cm and the brace 100cm.
Then we make 20 excavations for concreting.In one direction, 240 centimeters apart (as in the drawing) and the entire structures are 225cm apart (squares 2x2,1m).It is worth planning the layout in advance (try on the 40x40). profiles
It is important that the structures are concreted evenly and vertically.After the concrete has hardened, we install the aluminum profiles horizontally 40x40.We connect the profiles together with connectors and screws M10x25.The 40x40 profiles are screwed to the posts with M10x80. screws.We insert the screw head into the profile.
We place the panels on the profiles and secure them with clamps.
If strong side winds are expected, the structure can be additionally strengthened with the so-called bracing/strut using additional 2 posts with a length of 230cm attached to the back of the structure at an angle (one fastening at the bottom of the set in the drawing, and the other at the top of the set in the drawing).We dig up these struts separately - they are not included in this set.
The effective angle of inclination of the panels is 22 degrees.